-1.png?width=400&height=99&name=MicrosoftTeams-image%20(18)-1.png)
Countdown Duration
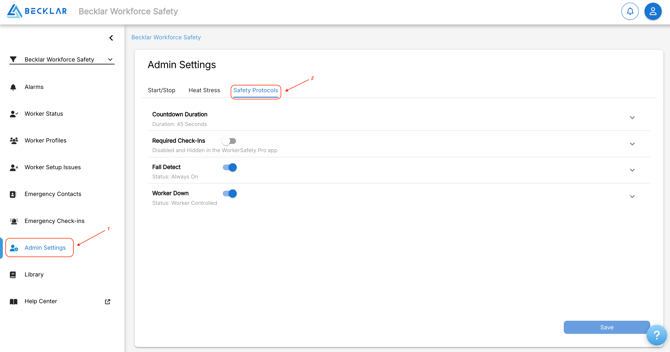
1. Log in to the Safety Portal by visiting: https://safetyportal.becklar.com/
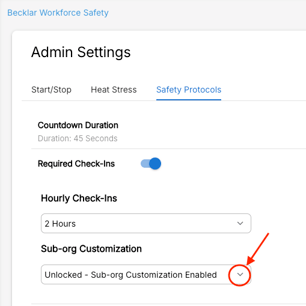
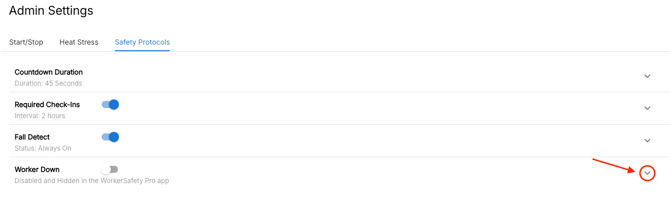
2. Click "Admin Settings." Then click "Safety Protocols."
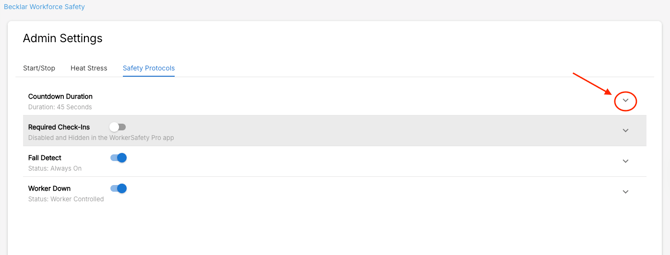
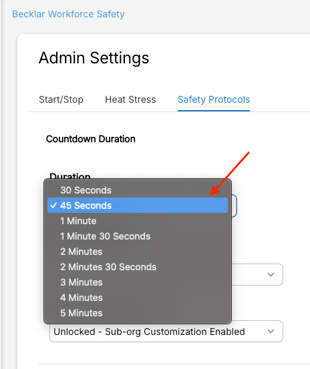
3. Click the dropdown arrow next to "Countdown Duration" to open its settings.
4. Click the dropdown arrow under "Duration" to select the duration of the countdown timer (in this example, the admin has set it to 45 seconds. This means that when a Fall, Worker Down, or missed Check-in is detected, a worker will have a 45-second window in which they can clear the alarm. After the 45-second countdown expires and the worker does not clear the alarm, all Tier 1 emergency contacts will be notified.)
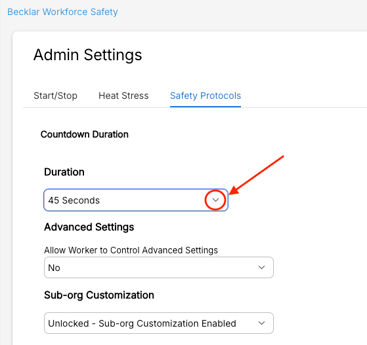
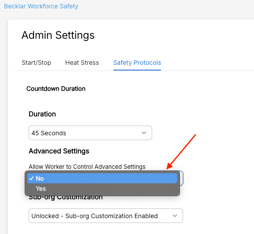
5. Click the dropdown arrow under "Advanced Settings" to choose whether to allow workers the ability to change the duration of the countdown timer on their devices (in this example, the admin has selected "No." This means workers will not be able to change the countdown duration.)
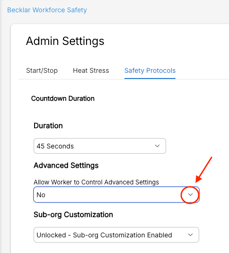
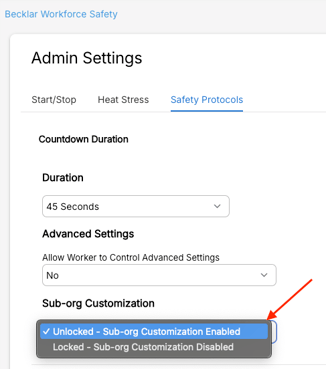
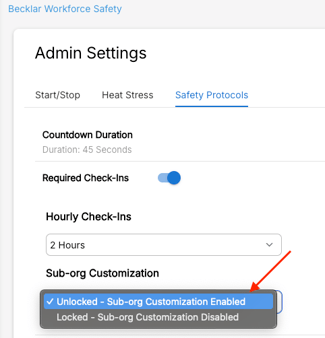
6. Click the dropdown arrow under "Sub-org Customization" to choose whether to allow admins in sub-orgs under the org for which you are configuring to change the settings for their own team (in this example, the admin has enabled sub-groups the ability to change these settings by selecting "Unlocked - Sub-org Customization Enabled".)

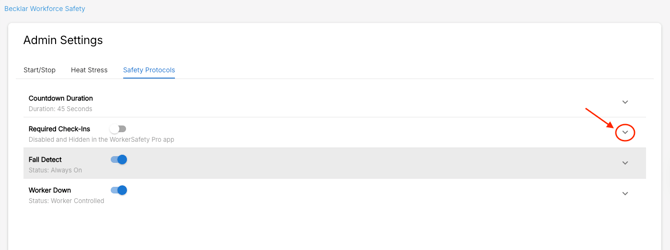
Required Check-Ins
7. Click the dropdown arrow next to "Required Check-Ins" to open its settings.
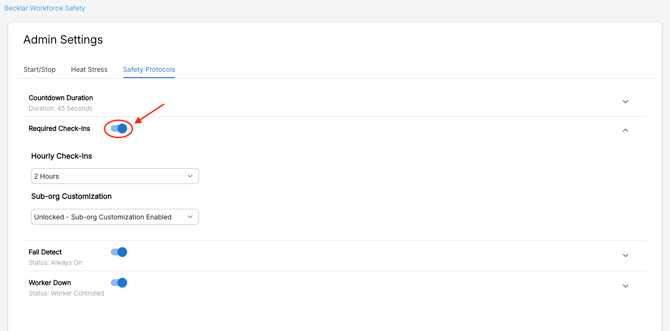
8. Toggle the switch next to "Required Check-Ins" to turn it on. Otherwise, leave it off. When it is off, "Required Check-Ins" will be disabled and hidden in the WorkerSafety Pro app (in this example, the admin has turned it on.)
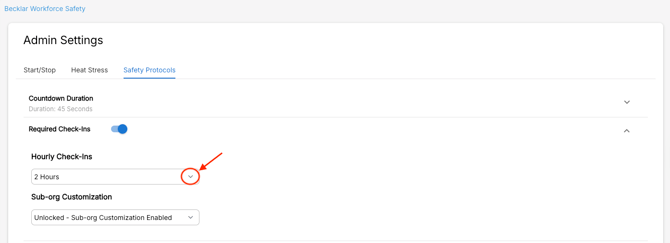
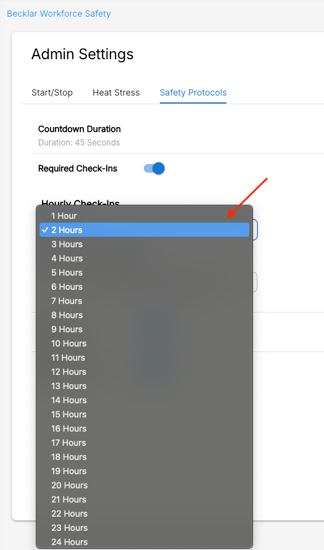
9. Click the dropdown arrow under "Hourly Check-Ins" to select the frequency of the check-ins (in this example, the admin has selected 2 hours.)
10. Click the dropdown arrow under "Sub-org Customization" to choose whether to allow admins in sub-orgs under the org for which you are configuring to change the settings for their own team (in this example, the admin has enabled sub-groups the ability to change these settings by selecting "Unlocked - Sub-org Customization Enabled".)
Fall Detect
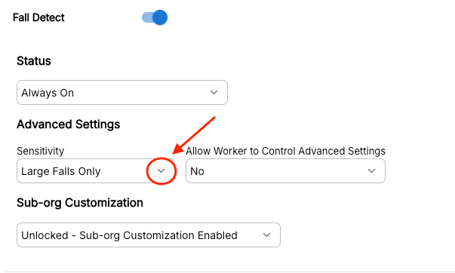
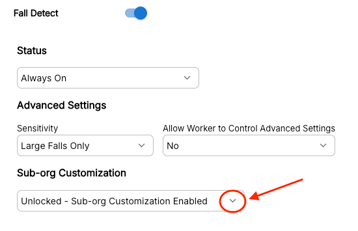
11. Click the dropdown arrow next to "Fall Detect" to open its settings. Then, toggle the switch next to "Fall Detect" to turn it on. Otherwise, leave it off. When it is off, "Fall Detect" will be disabled and hidden in the WorkerSafety Pro app (in this example, the admin has turned it on.)


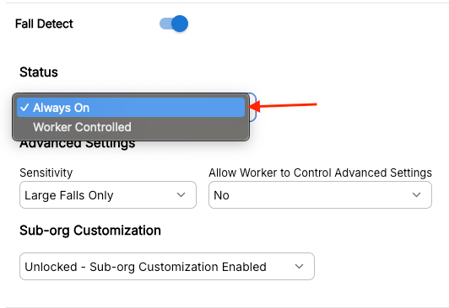
12. Click the dropdown arrow under "Status" to keep Fall Detection always on or to give workers the ability to control it (in this example, the admin has configured Fall Detection to be always on).
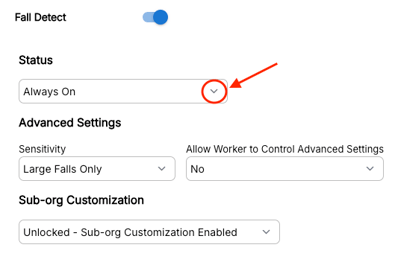
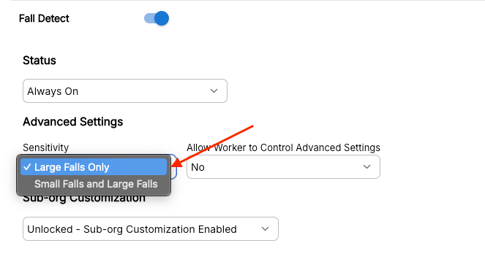
13. Click the dropdown arrow under "Sensitivity" to select between "Large Falls Only" and "Small Falls and Large Falls Only" (in this example, the admin has selected "Large Falls Only").
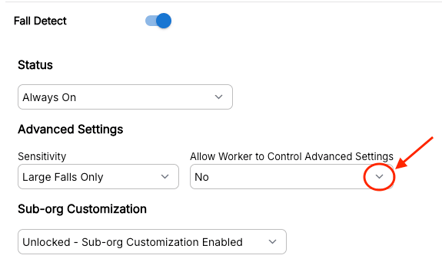
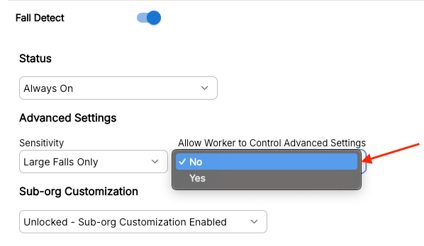
14. Click the dropdown arrow under "Allow Worker to Control Advanced Settings" to allow workers the ability to control their own settings (in this example, the admin has selected "No." This means workers will not be able to adjust Fall Detection's sensitivity.)
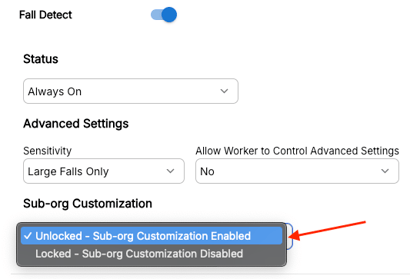
15. Click the dropdown arrow under "Sub-org Customization" to choose whether to allow admins in sub-orgs under the org for which you are configuring to change the settings for their own team (in this example, the admin has enabled sub-groups the ability to change these settings by selecting "Unlocked - Sub-org Customization Enabled").
Worker Down
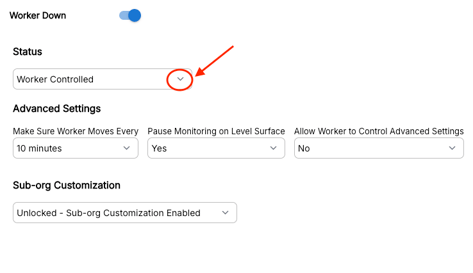
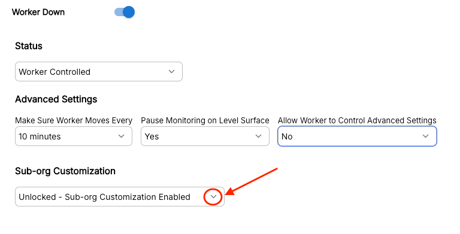
16. Click the dropdown arrow next to "Worker Down" to open its settings. Then, toggle the switch next to "Worker Down" to turn it on. Otherwise, leave it off. When it is off, "Worker Down" will be disabled and hidden in the WorkerSafety Pro app (in this example, the admin has turned it on.)
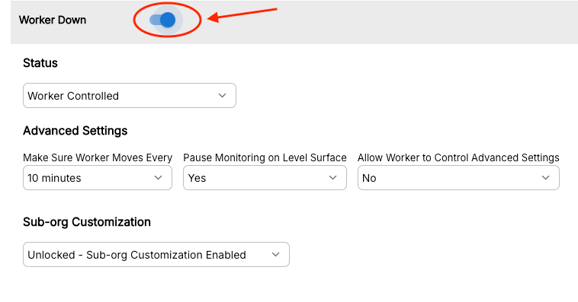
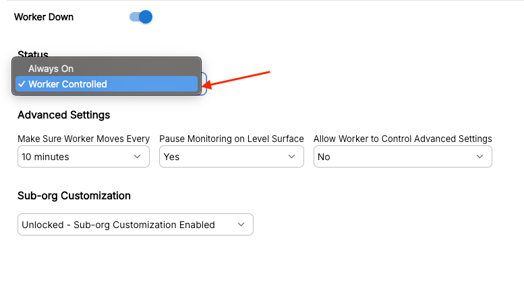
17. Click the dropdown arrow under "Status" to keep Worker Down always on or to give workers the ability to control it (in this example, the admin has configured Worker Down to be "Worker Controlled." This means the worker will have the ability to enable or disable Worker Down on the WorkerSafety Pro app).
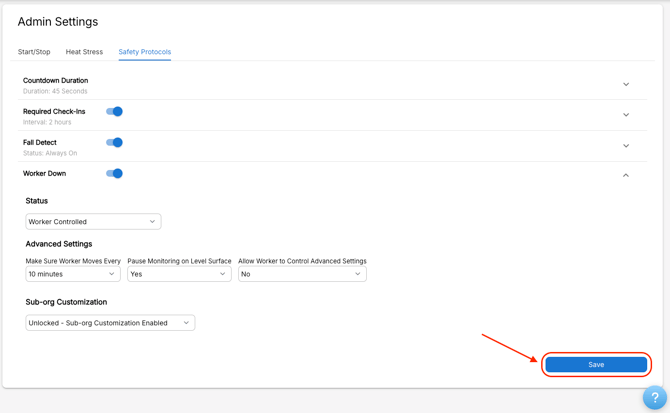
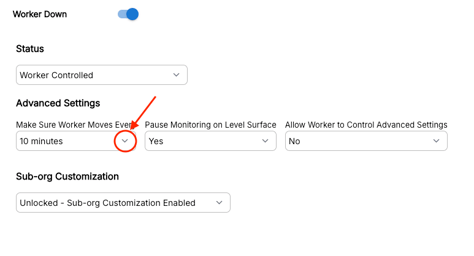
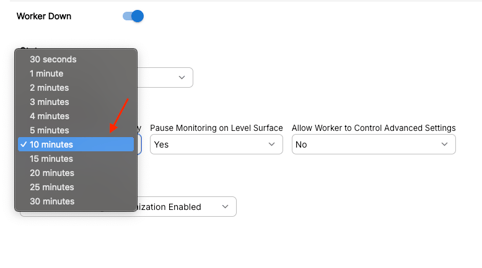
18. Click the dropdown arrow under "Make Sure Worker Moves Every" to select the time during which movement must be detected (in this example, the admin has set the time to 10 minutes.) If no movement is detected after that time expires, the WorkerSafety Pro app will alert the worker by starting a countdown before an alarm is triggered.
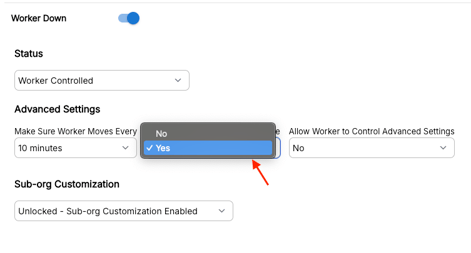
19. Click the dropdown arrow under "Pause Monitoring on Level Surface" to select whether to pause detection when the worker's device is on a level surface like a desk (in this example, the admin has selected "Yes." This means that when the worker's phone is on a flat surface, Worker Down will be paused.)
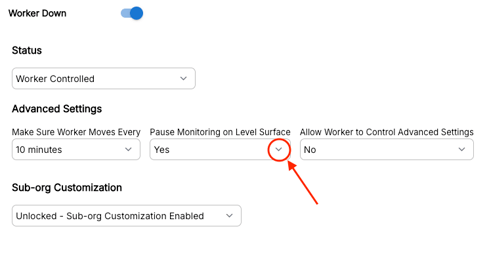
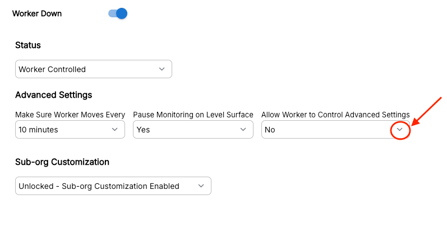
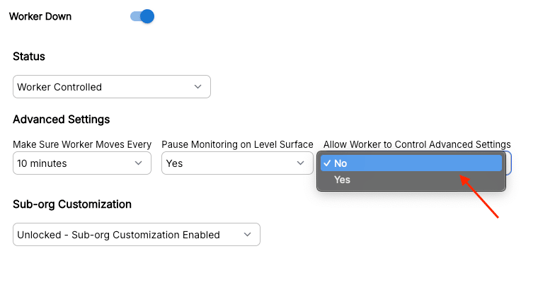
20. Click the dropdown arrow under "Allow Worker to Control Advanced Settings" to allow workers the ability to control their own settings (in this example, the admin has selected "No." This means workers will not be able to adjust Worker Down's timer nor whether or not to pause monitoring on a level surface.)
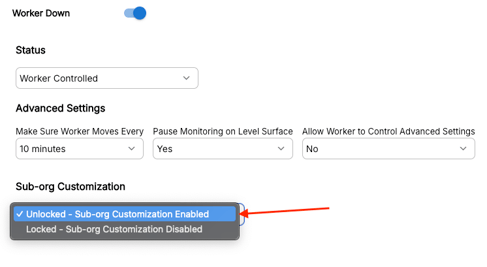
21. Click the dropdown arrow under "Sub-org Customization" to choose whether to allow admins in sub-orgs under the org for which you are configuring to change the settings for their own team (in this example, the admin has enabled sub-groups the ability to change these settings by selecting "Unlocked - Sub-org Customization Enabled").
22. Click "Save."