-1.png?width=400&height=99&name=MicrosoftTeams-image%20(18)-1.png)
Starting an advanced check-in
- From the home screen, tap Advanced once you start work.
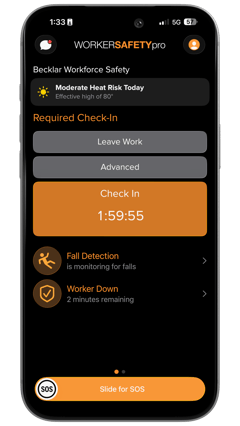
- Use the picker below the text "If I'm not heard from in" to set the length of your check-in. Scroll the left wheel to choose hours and the right wheel to choose minutes. The timer can be set up to a maximum of 24 hours. If your administrator has required check-ins turned on, you will not be able to set the timer longer than your required check-in interval.
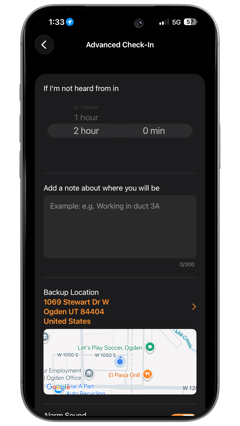
- Under Add a note about where you will be, enter a short description of your location and the work you'll be performing (for example, "I'm in duct 3A"). This note is shared with your responders if the check-in is missed, so be as specific as you can. The field holds up to 300 characters, and the counter below the box shows how much space you have left.
- Optional: Tap the address listed under Backup Location to change it. Type in the address you want referenced as your location if the check-in is missed, then tap Save Location. Please keep in mind that this is only applicable if you will be leaving cell service and Wi-Fi connectivity. If you are not leaving connectivity, you do not need to do this.
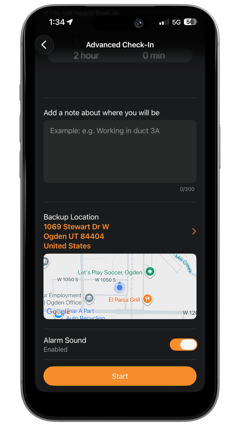
- Scroll down to the Alarm Sound option. Leave this enabled unless the noise would potentially place you in danger. When enabled, your phone will sound an alert before the alarm is sent, giving you a chance to check in.
- When finished setting up the check-in, tap Schedule.
How advanced check-ins interact with required check-ins
- An advanced check-in cannot be set for longer than the required check-in interval configured by your administrator. If your required check-in is 2 hours, the longest advanced check-in you can set is 2 hours.
- While an advanced check-in is active, it takes the place of your required check-in timer for the length of the check-in you scheduled.
- Once you clear the advanced check-in, your timer resets back to your organization's required check-in interval and your normal check-in schedule resumes.
Checking in
- After scheduling the check-in, you will be guided back to the home screen. You'll see a large orange Check In button displaying a countdown timer showing how much time is left before an alert is sent.
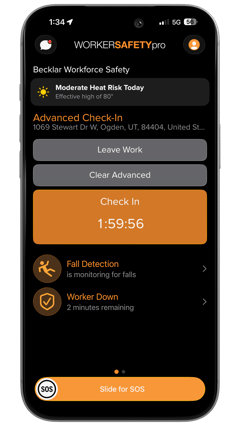
- To check in, simply tap that button. This resets your timer to the full length you originally set for the check-in.
- Repeat this any time you want to reset the timer. As long as you check in before the countdown runs out, no alert is sent.
Clearing an advanced check-in
When you are finished and no longer need the advanced check-in, tap Clear Advanced Check-In. This removes the advanced check-in, and your timer resets back to the required check-in timer set by your administrator. To start another advanced check-in, follow the steps in the "Starting an advanced check-in" section above.
Next StepsNow that you've learned about advanced check-ins, you may want to review WorkerSafety Pro's other check-in systems. Click here to view the article on required check-ins.